How to Create Groups in Figma Variables and Check Bindings
Learn how to create groups in Figma variables with the menu or slash names. Keep mode values intact and verify bindings before a library update.

Open Local variables, choose a collection, select the rows you want to organize, and use New group with selection. You can also put slashes in a variable name: text/default puts default under text. Use a group to make an existing variable easier to find; use a mode when the same variable needs a different value in another context. If a library is already in use, test the new names in a consuming file before asking everyone to accept the update.
Open Local variables, choose a collection, select the rows you want to organize, and use New group with selection. You can also put slashes in a variable name: text/default puts default under text. Use a group to make an existing variable easier to find; use a mode when the same variable needs a different value in another context. If a library is already in use, test the new names in a consuming file before asking everyone to accept the update.
Choose a group, collection, or mode
Start with the question a designer asks while editing a layer. “Which color is for ordinary text?” is a navigation problem: group the text roles so they can be found together. “Which value does ordinary text use in a dark frame?” is a mode problem. In this example, text/default belongs to the Colors collection and has a value in both Light and Dark. Neither mode needs a duplicate variable named text/dark/default.
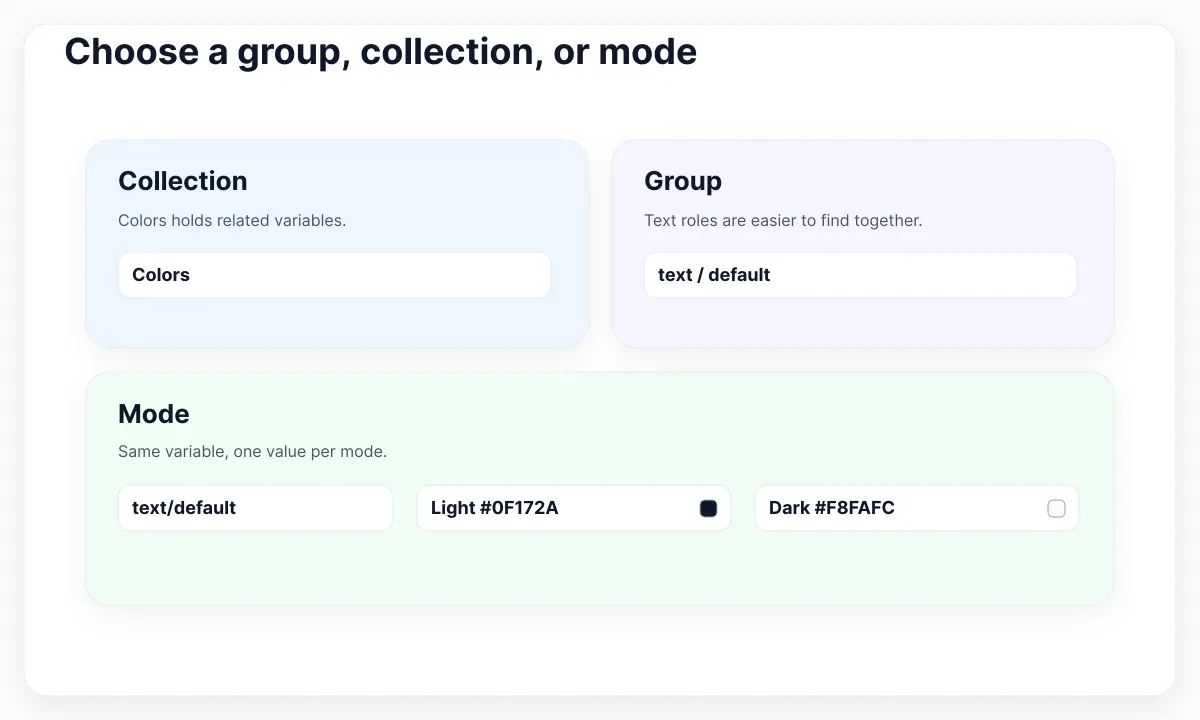
Figma’s variable management guide describes groups inside collections. Its guide to variable modes explains the separate job of modes: changing the values available for the variables in a collection. If text and surface roles follow the same light and dark contexts, they can stay in one collection for this exercise. If a set of variables genuinely needs to switch on a different axis, such as compact versus comfortable spacing, consider a separate collection so that choice can be made independently.
Use a fictional settings panel with three colors: default text, a field border, and a page surface. Write down which property each one serves. The field border and default text might happen to use the same gray in an early mockup. Give them separate roles if the design system needs to change them independently. Conversely, two field labels that always share the same rule can use the same text role. The job of grouping is to communicate these choices, rather than to reproduce every layer name in the file.
If you are inheriting an unfamiliar library, make a small inventory before rearranging it. Record the collection, full name, type, any alias, values by mode, and one real consumer for each candidate. This catches deceptively similar names such as border in two different collections. Our guide to tokens in web design explains how to distinguish a reusable design decision from an incidental value.
Group existing rows in Figma
Work in the source file and open the Variables modal from Local variables. With the intended collection selected, choose two or three rows that share a role. Use Command or Control for separate rows and Shift for a range. Right click the selection, pick New group with selection, and enter a name such as text. Figma documents dragging groups in the sidebar to reorder or nest them, and double clicking a group name to rename it.
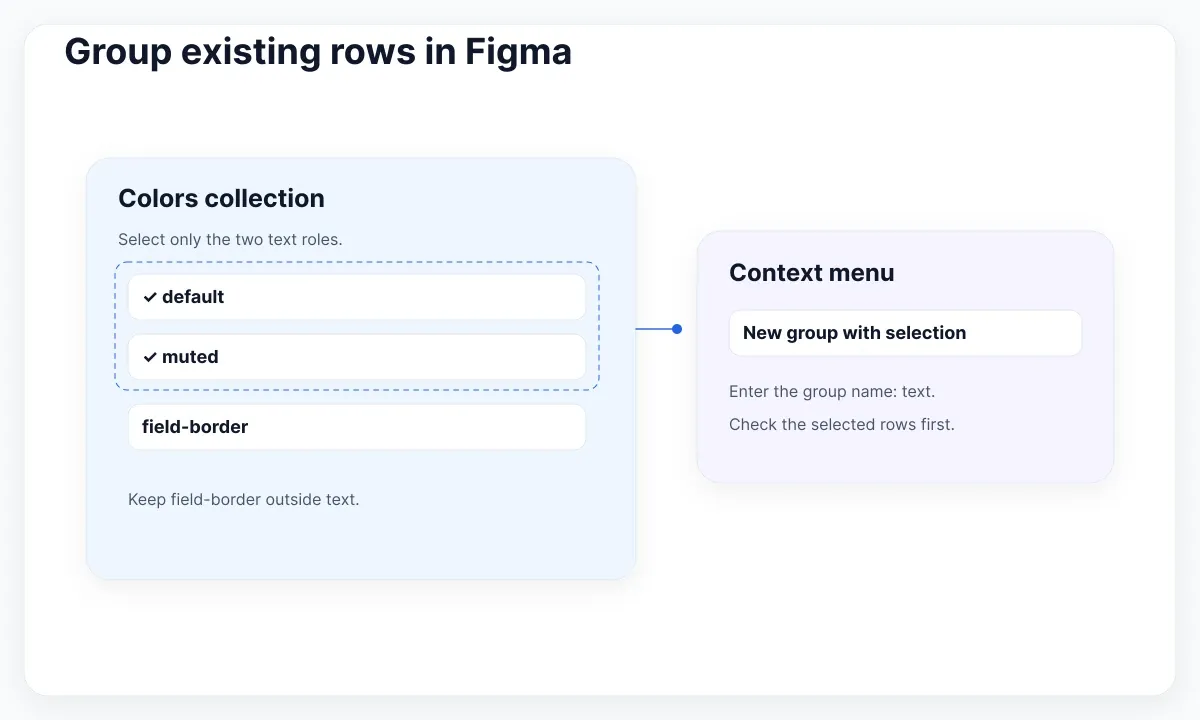
Try this on default and muted in a practice Colors collection. Once the group exists, compare the names and both mode columns with your inventory. Leave the color cells alone for this pass. Place a title and a helper message on the settings panel and inspect which variables each layer references. The purpose of the exercise is to preserve the current appearance while making the roles easier to locate.
A common mistake is to select a range that includes the row between two intended variables. Review the selected rows before creating the group. If field-border accidentally goes into text, correct the organization and verify the field specimen again. Use Ungroup from the group menu when the grouping itself was wrong. Figma also offers Duplicate group and Delete group; treat those as separate operations. Deleting or duplicating definitions does not belong in a simple regrouping pass.
Test the result with someone who did not perform the cleanup. Ask them to apply the default text role to a new label, then to pick the role for helper text. Observe whether they can distinguish the two without knowing their current values. If they search for “helper,” add a short description that says where the muted role is intended to be used. A name can remain concise when a description carries the usage rule.
Build paths that explain the role
When naming a new variable, use a slash where you want a group boundary. surface/page creates a short path. A deeper path such as border/field/default makes sense once you have multiple field border roles that people need to browse together. Figma’s guide to descriptions and names documents slash grouping and how to add a variable description. Decide on a convention in the source file before applying it to a long list.
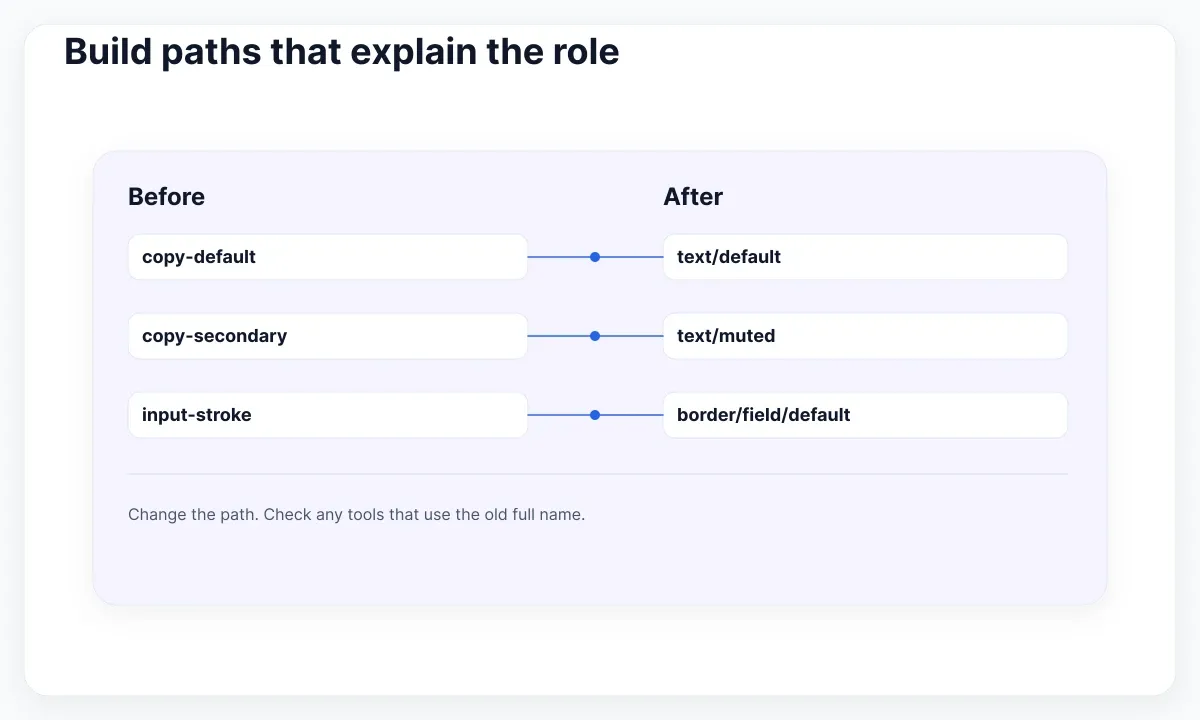
Use the leaf for the distinction a consumer must make. text/default and text/muted answer a question about emphasis. A pair such as text/gray-700 and text/gray-500 forces the consumer to infer the intended role and becomes misleading if values change. A raw palette may still use names such as gray/700; the palette and the role serve different readers. A designer applying a field border needs the role, while a maintainer adjusting the palette needs the value family.
Prepare a small crosswalk. In the practice file, rename copy-default to text/default and copy-secondary to text/muted; move input-stroke to border/field/default. Give each change a reason. Before applying it, search for the proposed path in that collection and look for a role that already exists. If you find one, leave both definitions intact until you know whether their values and consumers really are interchangeable. Merging them requires a separate decision.
Figma’s developer reference distinguishes variable names and identifiers from the collection’s modes. For tooling that reads paths, a name change is still visible even when the screen looks identical. Inventory any script, handoff table or token transform that uses full names. Put the old path next to the new one and give the downstream owner a chance to check it. For a code mapping example, see how to map Figma variables to Tailwind.
Check the same layer in both modes
On the settings panel, use the proposed text, surface and border roles on three separate layers. Create one frame in Light and one in Dark for the same collection. Use the same specimen in both. Compare each layer against its expected variable and the correct mode value. A matching pixel color is useful evidence only after you have checked the binding: a hard coded fill can coincidentally match in one mode.
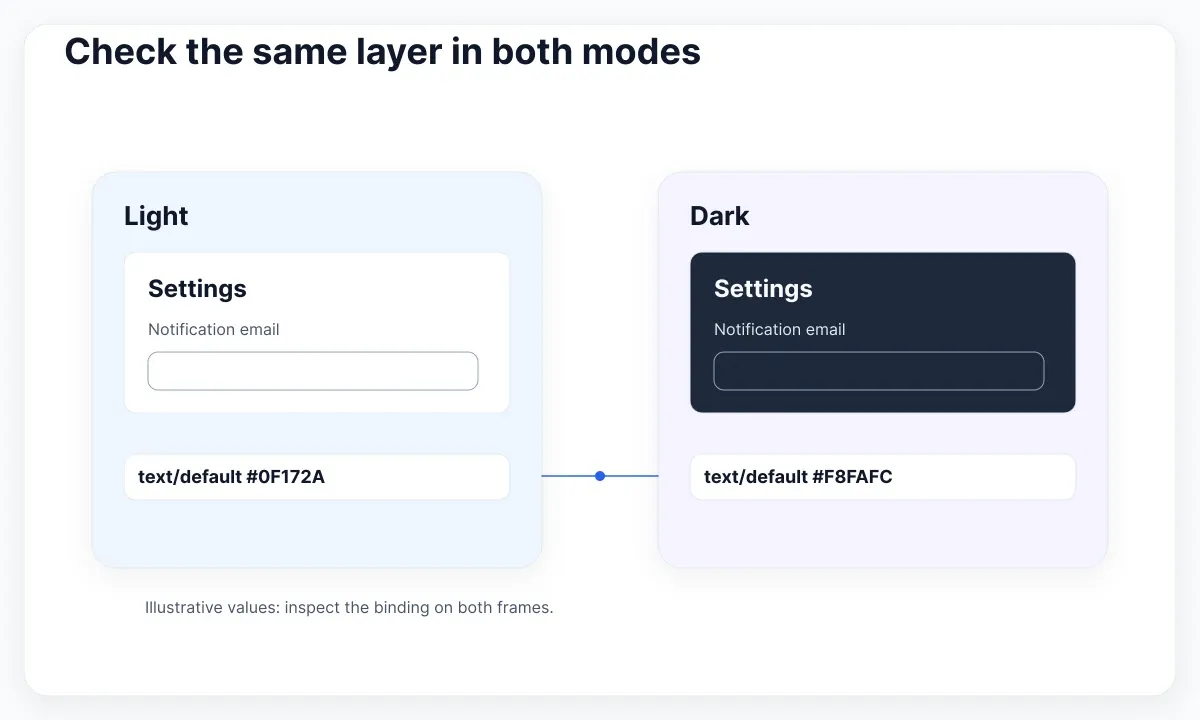
Test one deliberate failure in the practice copy. Replace the helper text fill with a plain color that matches Light. Switch to Dark and look at the discrepancy. Then restore the binding and repeat the switch. This makes the difference between a token label and a connection visible to the team. If a value comes through an alias, check the target as well as the role name. A successful rename does not establish that an alias points to the intended source.
If a layer shows a style name rather than the variable you expected, inspect the style and the property it supplies before replacing anything. A reusable style may already carry a variable binding. Our guide to variables and styles in Figma shows how to trace that relationship. For the regrouping review, record whether the layer uses a direct binding or a style so a teammate can repeat the check later.
| Layer | Expected path | Evidence to record |
|---|---|---|
| Settings heading | text/default | The fill uses the same role in both frames; record the value shown in each mode. |
| Field outline | border/field/default | The stroke points to the intended variable; check it separately from the surface fill. |
| Page surface | surface/page | A newly bound frame can find the role in the picker without its old name. |
Finish with a brief comparison of the old and new names. Write what changed in plain language: “Moved three color roles into text and border groups; mode values stayed the same.” If a test exposes an unintended change, stop and isolate it in the practice file. Keep a separate proposal for any palette, contrast or alias change you discovered while reviewing; mixing it into the rename makes a visual difference harder to explain.
Verify a library consumer
If these variables are shared across files, keep one consumer with representative layers and instances. Start by checking the state before the release. After the source owner publishes the library change, use Figma’s review and accept library updates workflow in the consumer. Figma’s library publishing guide explains why changes made in the source file alone are not yet available as an update elsewhere.
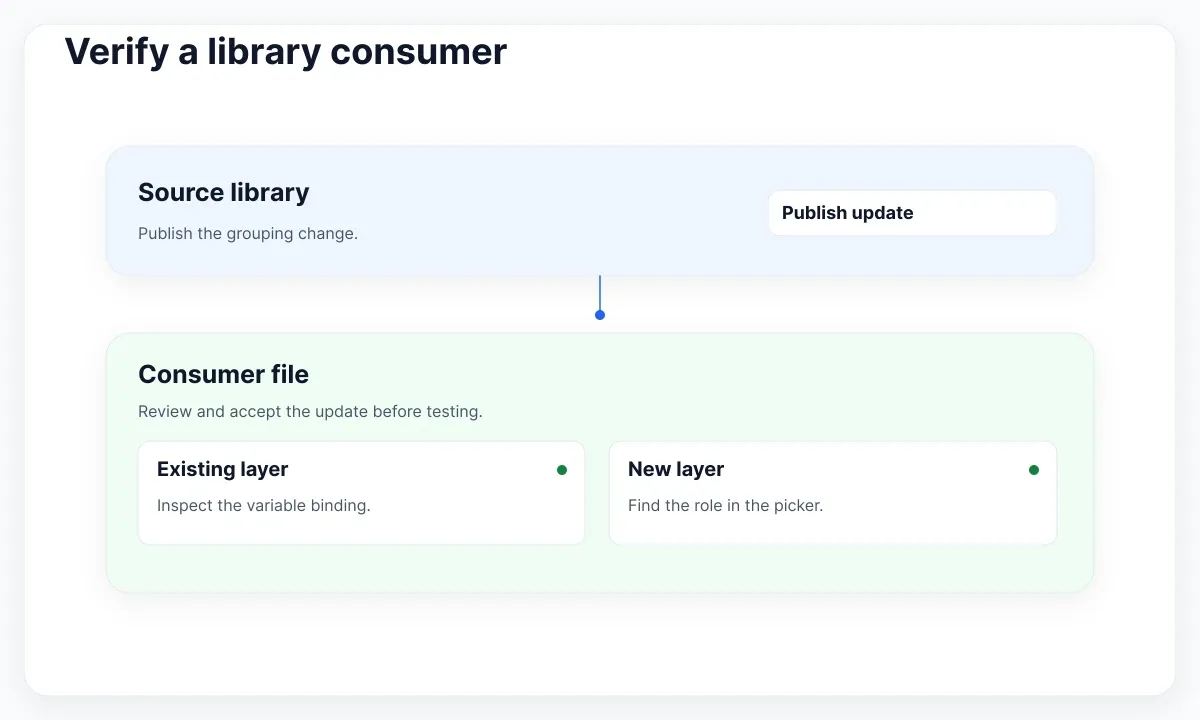
Use two small tests in that consumer. First inspect an existing title or field and confirm that it still uses the expected role after accepting the update. Then bind a new layer from the picker without referring to the old name. A release can pass the first test but still leave people unable to find the right token for new work. Check both Light and Dark again if the library supports them. Record the file, the role paths and any differences you saw.
If the code pipeline keys off names, run a before and after comparison of the relevant output with the team that owns it. An unexpected deletion in a diff is a reason to stop and inspect the mapping. For a local file that has never published a library, use a second page or a representative frame to repeat the existing and new binding checks. The cross-file steps only apply when consumers actually use a shared library.
Before inviting a wider rollout, write two short checks in the change note: “Locate the text role from its new group” and “Open the existing specimen in each supported mode.” If the reviewer only has a screenshot, ask for the source layer or a working consumer file. The screenshot is enough to spot a visible regression, but it cannot tell you whether the layer is bound to the intended variable. Keep a record of the former path until the last named dependency has been checked.
For the pilot, record a result per layer rather than marking the whole file done. For example, the heading may keep its binding while the helper text still uses a fixed fill. A short note naming that layer gives the owner a concrete next action. Repeat the checks after correcting it and keep the repaired specimen for the next cleanup.
Review the picker with EmviUI
The EmviUI Figma kit provides an editable design starting point with reusable components and design variables. Use an editable specimen you have access to, such as a field beside a heading, to rehearse the task. Ask a teammate to find a text role and a border role before comparing the visuals in each mode. The EmviUI image below shows an example of a library color picker with names and swatches. It illustrates discoverability; use the current Figma documentation for the group controls.
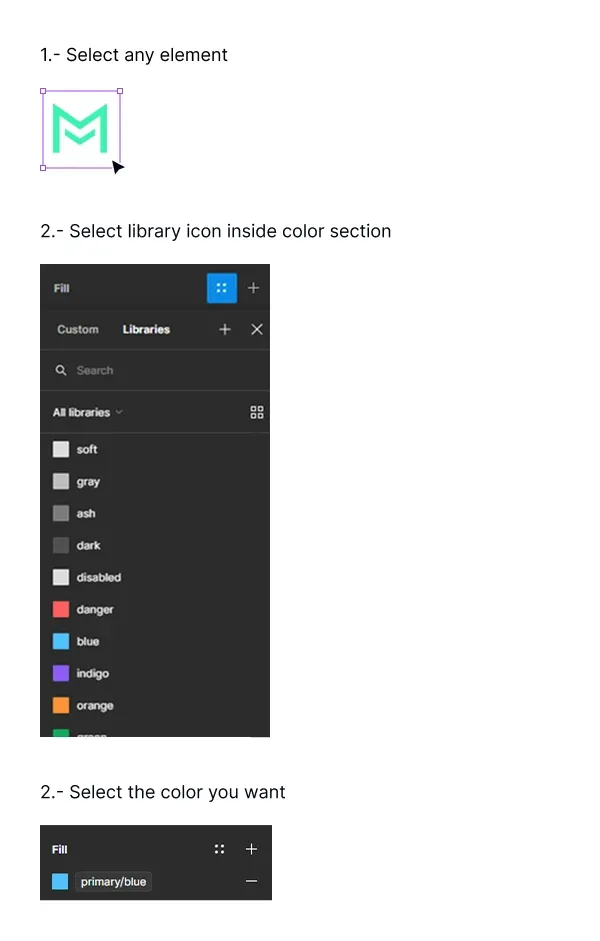
Keep your proposed path convention on the review page beside the sample. Then inspect which assets the kit and your file actually expose. The paths in this guide are for the exercise, not a list of EmviUI variable names. The kit supplies specimens to test the choices; your team decides how to name roles, who owns the shared collection and how to check consumers. A useful result is a short path a colleague can find twice: once when updating an existing layer, and once when creating a new one.

Pablo Mayoral
Senior UX/UI & Web Designer with 10+ years of experience. Creator of EmviUI (10k+ components Figma design system), UImand, and Vitamin Bootstrap. Currently designing digital products at CQMRewards.